Depending on the application, the surfaces of metal components have to meet very high requirements. For example, sealing or bearing surfaces, visible decorative surfaces, or surfaces in the medical field.
An automated inspection of all components is a must in such cases.
The intelligent 3D defect detection of our sensor technology offers significant advantages and enables minimal pseudo-error rates.
Our automated inspection systems have been used for many years in the quality assurance of complex components (before or after machining). Well-known examples include crankcases, cylinder heads, gearbox housings, electric motor housings, drive components, …
PROFACTOR creates quality
We develop and build our sensor systems in-house, so we can directly meet your unique requirements. Depending on the project, we integrate our inspection technology as a subsystem or deliver complete turnkey solutions for your measurement task.
We are happy to be your partner when it comes to demanding inspection tasks. We look forward to hearing from you!
Our topographic sensor technology
Conventional 2D optical methods cannot intrinsically distinguish between 3D defects and purely optical surface features. This leads to high pseudo-error rates and increased effort in manual re-inspection.
The inspection technology developed by PROFACTOR is based on a 3D approach and combines multiple lighting directions and high-resolution 2D cameras.
This makes it possible to correctly distinguish real defects such as scratches, inclusions, breakouts etc. from pseudo errors such as noncritical contaminations, color changes etc.
Advantages
- Robust pass/fail decisions
- Low pseudo-error rates – especially for process-related discolorations or liquid residues
- AI-based classification based on over 20 defect parameters
- Short cycle times due to high scanning speed or multi-sensor systems
- Inspection of inner surfaces of drilled holes, bearing surfaces, etc.
- Comprehensive documentation of quality data and extensive analysis for process optimization
- Significant savings in manual final inspection
- Based on many years of experience in industrial surface inspection
Sensors and their Applications
Inspection of surfaces
TPScan Sensor
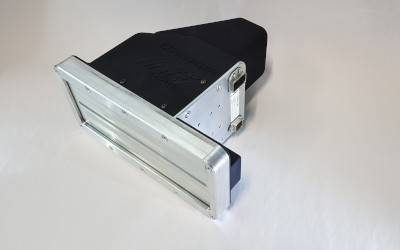
This sensor is specially designed for fast and precise inspection of large, flat surfaces.
Up to 5 illumination directions enable a minimal pseudo-error rate.
Lateral surface sensor
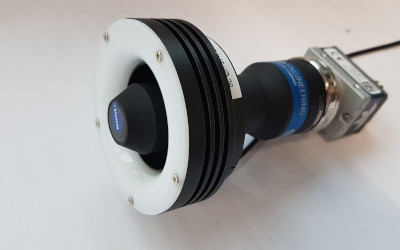
This sensor includes a high-resolution camera and an integrated lighting unit.
It is flexible and individually adaptable to specific measurement requirements, and its compact design makes it easy to integrate.
Tooth flank sensor
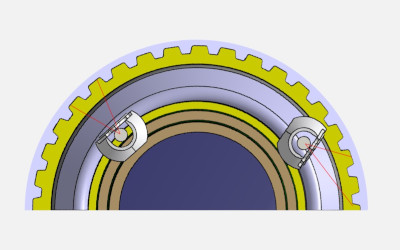
This flexible sensor design enables the inspection of internal gears of various diameters.
The arrangement of three sensors guarantees fast, precise and simultaneous inspection of the surfaces of the tooth flanks and tip.
Inspection of drilled holes
Rotating sensor
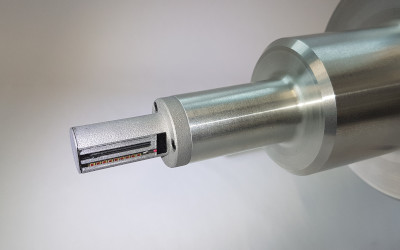
Rotating sensors are the perfect solution when inspecting inner surfaces of drilled holes, radii, recesses, etc.
The sensor is based on a rotating camera movement and thus enables the inspection of the lateral surfaces of drilled holes.
Linear bore sensor
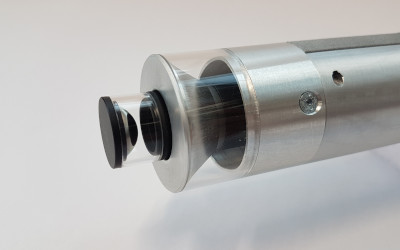
In contrast to the rotation sensor, the linear bore sensor captures the image by moving the sensor in the direction of the bore axis.
Very deep holes can be inspected. Individual sensor lengths are possible.
Endoscope sensor
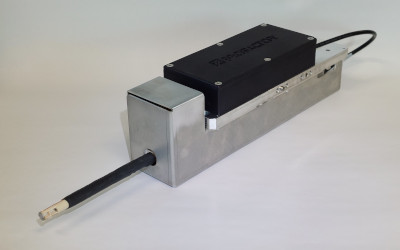
Endoscope sensors are designed for narrow or deep holes, or surfaces that cannot be reached by other sensors due to their size.
With our rigid endoscope sensor, drilled holes down to a diameter of 4mm can be inspected.
References





Success Story
Industrial inspection for quality assurance of E-drive housings in the BMW Group plan Steyr.


